With Gatsby and NetlifyCMS its easy to get a fast SEO friendly blog thrown together. It’s a great solution if you’re building a website for someone less technical, they can manage the website through the CMS and never have to touch the scary Javascript lurking beneath.

Install Gatsby
The first step of this project is to install the Gatsby command line tool. Similar to create-react-app, the gatsby-cli tool lets you set up and work on new projects quickly. While it is not necessary, I reccomend installing the package globally. For the purposes of this demonstration I will be using NPM as the package manager, but in real life I use Yarn.
npm install -g gatsby-cliStart Project
Great! Now that we’ve installed our gatsby tools, lets cook up a new project. The following command will create a new gatsby project under the folder “netlify-cms-tutorial” and it will load a project template from the url provided. In this instance we are loading the gatsby-starter-blog project. This starter is great for us, because it is set up to source Markdown files as blog posts.
gatsby new netlify-cms-tutorial https://github.com/gatsbyjs/gatsby-starter-blog-themeDone? Great! Now we’re ready start working with Gatsby. Let’s navigate into our new project folder.
cd netlify-cms-tutorialIf you want to make sure everything runs properly, you can start your live server to see the framework we’re dealing with. Make sure to reboot your live server after we install plugins!
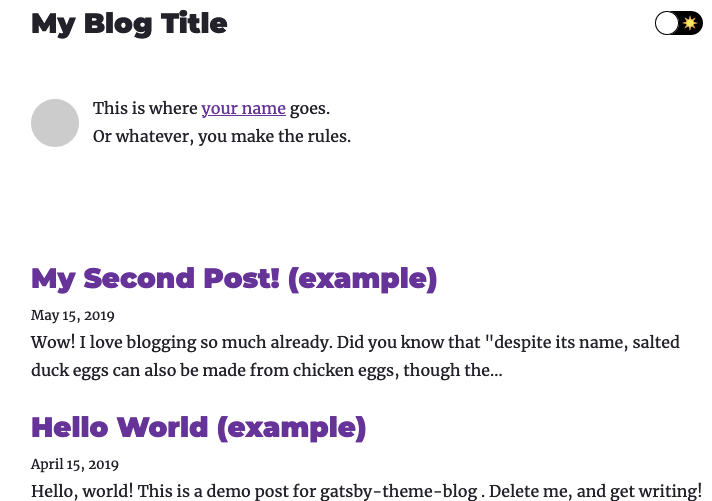
gatsby developYou should see something like this:
Download the Plugins
Alright! look at all these cool files. At this point your folder structure should look like this:

Hopefully this isn’t too tricky to figure out, but your images and content end up in the content folder. Your templates and page designs end up in the src folder.
Before we get going we need to add a couple of plugins to hook up to our CMS. Run the following command from your project directory.
npm install netlify-cms-app gatsby-plugin-netlify-cmsInstall the Plugins
Great! We’ve downloaded some plugins. Now how do we tell gatsby to use them? Gatsby uses a file called gatsby-config.js to handle its plugins. If you open this file, you’ll notice the plugins section contains an array. This is where we list plugins! Add the following to the array, so that it looks like this:
module.exports = {
  plugins: [
    {
      resolve: `gatsby-theme-blog`,
      options: {},
    },
    `gatsby-plugin-netlify-cms`
  ],
// ... Sitemetadata information goes below
}
Hot dog! Now we’ve told gatsby that we are going to be using netlify-cms. It doesn’t know what we’re going to be doing with the CMS. That comes next.
Configuring our CMS
Configuring the CMS is easy. Think of it as a configuration file for Wordpress’ Advanced Custom Fields. This is where we’ll be telling the CMS what shape our content should have.
From your root directory, create a folder named “static”. Inside this folder, create another folder, this one called “admin”. This is where our configuration file will go. Create a new file inside the admin folder called “config.yml”
Inside config.yml, paste the following:
backend:
  name: test-repo

media_folder: static/assets
public_folder: /assets

collections:
  - name: blog
    label: Blog
    folder: blog
    create: true
    fields:
      - { name: path, label: Path }
      - { name: date, label: Date, widget: datetime }
      - { name: title, label: Title }
      - { name: body, label: Body, widget: markdown }
OK There’s a lot going on here so lets break it down. The first section, backend tells netlifyCMS about our backend provider. At the moment we don’t have one. Netlify is kind enough to provide a dummy backend called ‘test-repo’ while we’re still testing the project.
Below that we have some fields which identify important folders for our project. When we upload media through the CMS, it will be stored in the static/assets folder. When the site gets built and all of our media gets processed, the optimized files will live in public_folder.
But what is this “collections”? Collections are groupings of CMS data. This is how we configure the CMS, by defining the things inside the collections. Here, we’ve created a collection named “Blog”. Each Blog entry has a Path object, a datetime object, and then two fields, one for the title of the blog post and one for the content. We are using the markdown widget for the ‘body’ field, which allows us to use rich-text formatting when we finally start making content.
Let’s test to make sure everything works.
If you haven’t already, close your live server with Ctrl+C and restart it with gatsby develop. By default your website will go live at the following address: localhost:8000 .
Now lets make sure the CMS loads properly… Navigate to localhost:8000/admin/ Of note, make sure you put the trailing slash after admin! This is crucial!
If all goes well you should see the following:
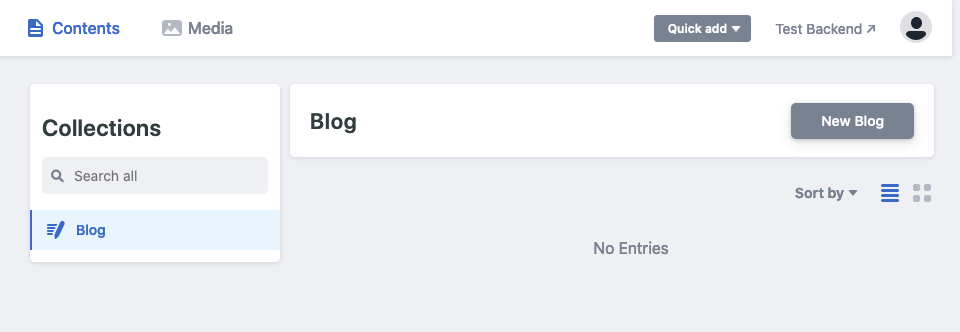
If you try to add a new blog post it will show up on your page! However, you will notice that it dissapears when you close your development server. How come? Because we aren’t actually hooked up to backend yet. Because we are using netlify’s test-repo service, none of our changes are permanent. Let’s fix that.
Setting up the Backend
Gatsby and Git go together like peanut butter and jelly. For the purposes of this tutorial I am going to assume you know how to move your project into a git repo. Once you have your project commit and pushed to git, head on over to www.netlify.com and create an account.
Netlify is a fantastic hosting service that offers a lot of modern features. We’re interested in its ability to watch our git repos. Whenever it sees a change in your git repo, it triggers your gatsby-sites build process. NetlifyCMS works by committing new files to your github repo. So, every time you save an entry on your CMS it will trigger a netlify build and deploy your updated site!

Once you are logged in to Netlify, you will be presented with your dashboard. Adding a site to Netlify from Github is easy! Just click the “New Site from Git” option.
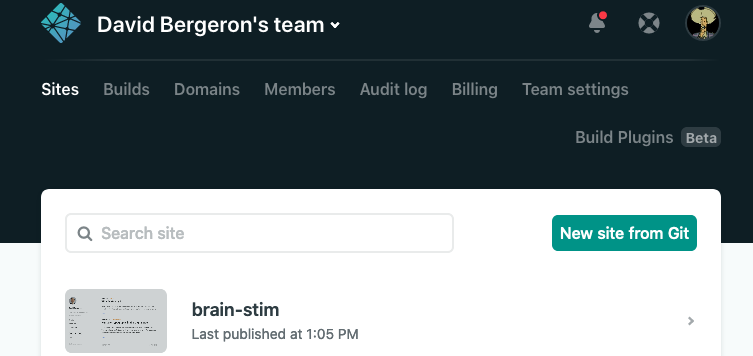
This will guide you through a series of prompts to add your website to Netlify. Once this has done, Netlify will clone your project and start building it for you. You will notice that Netlify probably gave it some sort of silly name like “molten-jaguar-124567”. No one one wants that! From the dashboard navigate to your new project. Click “Site Settings”.
You should see the following under “General”:
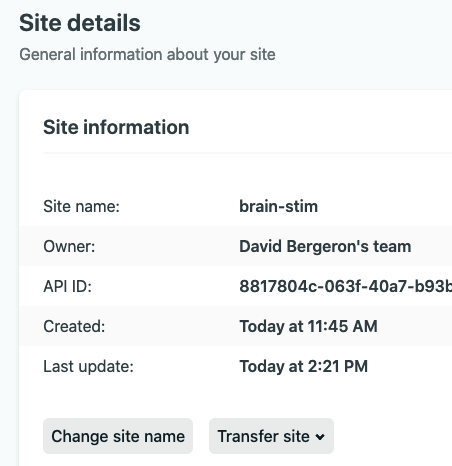
Click “Change Site Name” and then name it whatever you want. For example, if you named it “brain-stim”, you can access your new app at https://brain-stim.netlify.app.
Enable Authentication
If all goes well, after a few minutes your blog will be live and hosted. But if you try to access the admin dashboard (by adding /admin/ to the end of your base url), you’ll still be using the test-repo backend. Not what we want! We want new changes to save to our git repo.
To do this, we will be using Netlify’s Identity and git-gateway features. You enable both of these features through your site settings settings on the netlify dashboard. From the settings page, navigate down to “Identity”. Enable it.
We’ve just told Netlify that we want to use its identity servers for our authentication, but now we have to get the OK from our github repo. Under the new found Identity settings, scroll down to SERVICES.
Enable the Git Gateway, and then you should see something like this:
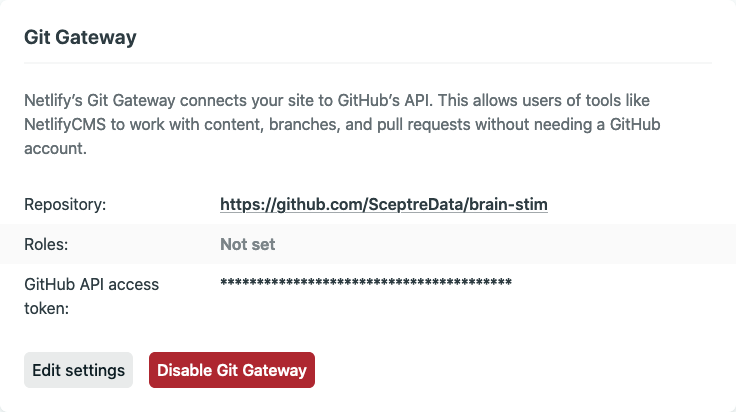
From this prompt you can create new user Roles. We aren’t going to be creating any right now, but it can come in handy. If it is empty, edit your settings and generate a new Github API Access token.
Almost there
Still with me? Good, there isn’t much left. Now that we’ve turned on our Netlify Identity and Git Gateway services, we need to make sure our project is properly set up.
Lets go back to our config.yml file. Change the backend section to look like this:
backend:
  name: git-gateway
  branch: master
This lets netlifyCMS know that we are using their authentication provider. It also tells the CMS to commit changes straight to the master branch. We aren’t messing around here, all of our commits go straight to production.
Using Git, commit and push these changes. Now, when you navigate to YOURSITEURL/admin/, you will be prompted to create an account and login.

From the CMS, try to make a new blog post. Changes you make from the CMS backend will be commit to your github repo as new markdown files. Just like that we are creating dynamic content! You will notice in the markdown widget its possible to add and manipulate images, making this entire process very smooth.
But Wait - It still isn’t working!
I’m sure you’ve written half a dozen blog posts so far. But they aren’t showing up on your website! This is because we haven’t told Gatsby where to find our dynamic content.
Before installing any new packages, you might want to run git pull. We’ve been adding files to our repo through the CMS remember?
Now, from the command line, run the following command:
npm install gatsby-source-filesystemand add the following to your gatsby-config.js
module.exports = {
  plugins: [
    {
      resolve: `gatsby-theme-blog`,
      options: {},
    },
    {
      resolve: `gatsby-source-filesystem`,
      options: {
        name: `markdown-pages`,
        path: `${__dirname}/content/posts/blog`,
      },
    },
    `gatsby-plugin-netlify-cms`,
  ],
// ... Site Metadata etc.
Notice how we’ve added the gatsby-source-filesystem plugin as the SECOND plugin in the array. You have to be careful here because the order of the plugins matters. What we’ve just done is we’ve told gatsby “Hey, we want you to look up files from the filesystem. Find them at the following path”.
Now save. Commit your changes. Push your changes. Curse the git gods while all of this happens. But lo and behold, once your site rebuilds…your blog posts should start to work!
